
Dual SIM technology is a game-changer for travelers, letting you use two different mobile plans on a single phone. Think of it as having two phone lines in one device. For anyone traveling abroad, this is a fantastic tool—you can keep your regular phone number active for calls and texts while using a second, affordable data plan to navigate, post photos, and stay connected without facing massive roaming bills.
Think of dual SIM as the ultimate travel hack for your phone. It gives you a level of freedom you just don’t get with a single SIM, letting you juggle two connections without carrying two phones. This is especially useful when you’re abroad, as you can pair your regular physical SIM card with a travel eSIM just for data.
So, what’s an eSIM? It’s a digital version of a SIM card that’s already built into your phone’s hardware. This removes the hassle of fiddling with tiny plastic SIM cards at the airport. Instead, you can download and set up a data plan from a provider like TapSim before you even pack your bags. When you land, you just switch on your travel eSIM, and you’re online instantly.
This setup gives you the best of both worlds:
For most travelers today, the choice boils down to using two physical SIMs or pairing a physical SIM with a modern eSIM. Here’s a quick look at how they compare.
| Feature | Two Physical SIMs | Physical SIM + eSIM |
|---|---|---|
| Setup Process | Requires physically swapping small plastic cards in a SIM tray. | Install the eSIM digitally via a QR code or app; no physical card needed. |
| Travel Convenience | Less convenient; you need to find and buy a physical SIM upon arrival. | Highly convenient; you can install your plan before your trip begins. |
| Activation Speed | Can take time, often involving queues and registration at a local store. | Instant activation on arrival, usually taking just a few minutes. |
| Phone Compatibility | Supported by older and some newer dual SIM phones. | Standard in most modern smartphones, including recent iPhones and Androids. |
As you can see, the physical SIM and eSIM combination is the most straightforward and flexible option for international travel, letting you get everything sorted before you leave home.
Dive into the world of dual SIM, and you’ll quickly run into a couple of acronyms: DSDS and DSDA. They sound technical, but they’re straightforward concepts that explain how your phone handles two active lines. For any traveler, understanding the difference can make your trip much smoother.
The vast majority of modern smartphones—from the newest iPhones to the latest Androids—use a system called Dual SIM Dual Standby (DSDS). The key word here is “standby.”
Think of DSDS as having call waiting, but for your two separate SIM cards. Both your home number and your travel eSIM are online and ready to receive calls or texts. However, only one can be actively handling a voice call at any given time.
So, if you’re on a call with your primary number, any incoming calls to your travel eSIM will go straight to voicemail. The same thing happens in reverse.
For travelers, this setup is practically perfect. You get to keep your main number active for those important texts (like bank authentications) while using your second SIM—your travel eSIM—for affordable, local data. DSDS manages this juggling act seamlessly.
A huge plus is that DSDS is very battery-efficient. Because only one SIM’s radio is fully powered up during a call, it sips power instead of guzzling it. That’s a massive advantage when you’re out exploring all day and can’t be tied to a power bank. You get all the connectivity you need without the battery anxiety.
This diagram shows a typical traveler’s setup: your home plan stays active for essentials, while the travel eSIM takes care of affordable data.
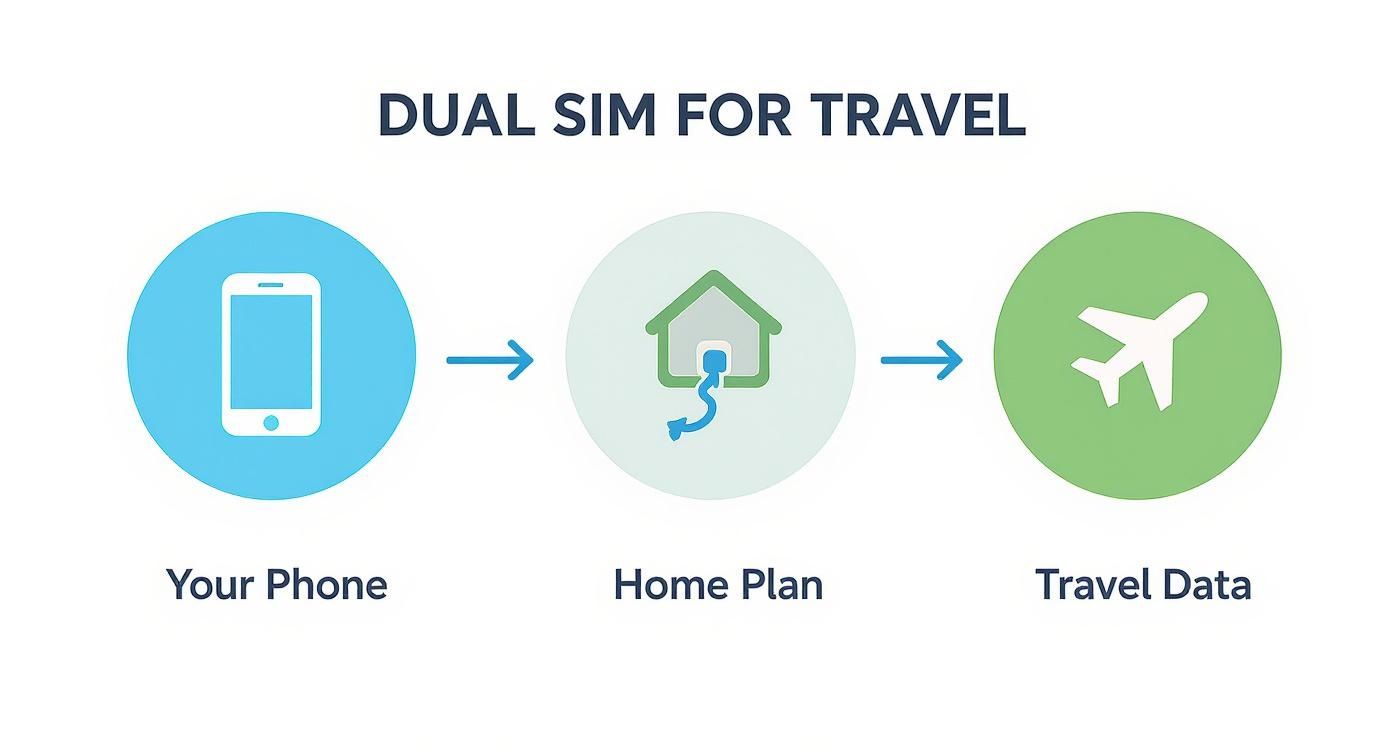
It’s all about giving each SIM a specific job. One handles your identity and must-have messages, while the other provides a cost-effective gateway to the internet.
The other, far less common, technology is Dual SIM Dual Active (DSDA). As the name implies, both SIMs can be fully and independently active at the same time. This means you could be on a call with one number and receive an incoming call on your second number, with the option to put the first call on hold to answer it.
While that sounds great in theory, DSDA requires the phone to have two separate sets of cellular hardware. This makes the phone more complex and expensive to build, and it drains the battery much faster.
For almost every traveler, the extra capability of DSDA isn’t necessary. The power-efficient and reliable DSDS system in your phone is more than enough to keep you connected without any fuss or a rapidly dying battery.
Ultimately, DSDS has become the industry standard for good reason. It hits that sweet spot between powerful features and practical efficiency, making it the ideal choice for anyone using a travel eSIM from a provider like TapSim on their next adventure.
Getting your phone ready for a trip is much easier than it used to be. Thanks to dual SIM technology, you can prepare for affordable, instant data before you’ve even packed. Let’s walk through the key steps so you can hit the ground running.
The very first thing you should do is label your plans. This small step will save you a headache later when you’re trying to figure out which SIM is which.
Once your new travel eSIM is installed, your phone will recognize two lines. To keep things clear, give them logical names.
This simple bit of organization means you can see exactly what’s happening in your settings at a glance, keeping you in complete control.
With your SIMs properly labeled, it’s time for the most important part: telling your phone what to do with them. When you’re traveling, the golden rule is simple: use your travel eSIM for all mobile data. This is how you avoid expensive roaming fees from your home provider.
Here’s what the settings menu typically looks like on an iPhone, where you can assign these roles.
See the “Mobile Data” option? Just tap that and choose your “Travel Data” plan. That’s it.
This one switch is the secret to making dual SIM work brilliantly for travel. It forces all your apps—from Google Maps and ride-sharing to Instagram and WhatsApp—to use your affordable, prepaid travel data. Your home number stays active for receiving calls and important SMS messages, but it won’t use any data, saving you from a nasty surprise on your next bill. For a step-by-step guide, check out our post on how to activate an eSIM on your iPhone.
Pro Tip: You can set all this up before you land. If you’re on a flight to Europe, for example, assign your travel eSIM as the data source while you’re still in the air. The moment you land and switch off airplane mode, your phone will connect to a local network using your new eSIM, giving you data from the moment you step off the plane.
One final, crucial check: make sure “Data Roaming” is switched OFF for your “Home Number” line. At the same time, ensure it’s switched ON for your “Travel Data” plan. This acts as a final safety net, making absolutely certain your home plan can’t rack up any accidental data charges.
For anyone who travels, this is where dual SIM technology really shines. By pairing your primary SIM with a travel eSIM, you can create the perfect setup for staying connected anywhere in the world. It’s a simple strategy, but it completely changes the game for staying online abroad.
This approach lets you keep your familiar home phone number active. That’s crucial for getting important calls and, more importantly, those two-factor authentication (2FA) texts from your bank or other key services. You stay reachable on the number everyone already has.
At the same time, your travel eSIM handles all your data. This means everything from navigating with Google Maps and booking a taxi to making video calls and streaming music is powered by a fast, affordable local network. It really is the best of both worlds, all in one device.
Let’s break down what this dual SIM setup looks like on a real trip. Imagine you’ve just landed in Rome for a summer holiday.
This simple setup turns your smartphone from a potential financial headache into your most powerful travel companion.
The convenience of this setup is largely thanks to eSIM technology. Globally, the rise in dual SIM usage is closely linked to the growth of eSIM adoption, which is popular with frequent travelers and remote workers who need to keep their home number active while using a local eSIM for data.
In fact, a vast majority of users find eSIM activation ‘easier’ or ‘very easy’ compared to handling a traditional plastic SIM card.
The goal is to separate your identity (your home number) from your internet access (your travel data). Dual SIM with an eSIM makes this separation effortless, giving you security, savings, and convenience.
Ultimately, this connectivity hack removes one of the biggest headaches of modern travel. You no longer have to choose between staying in touch and getting a shocking bill when you get home. You can have both, leaving you free to focus on what really matters: enjoying your adventure.
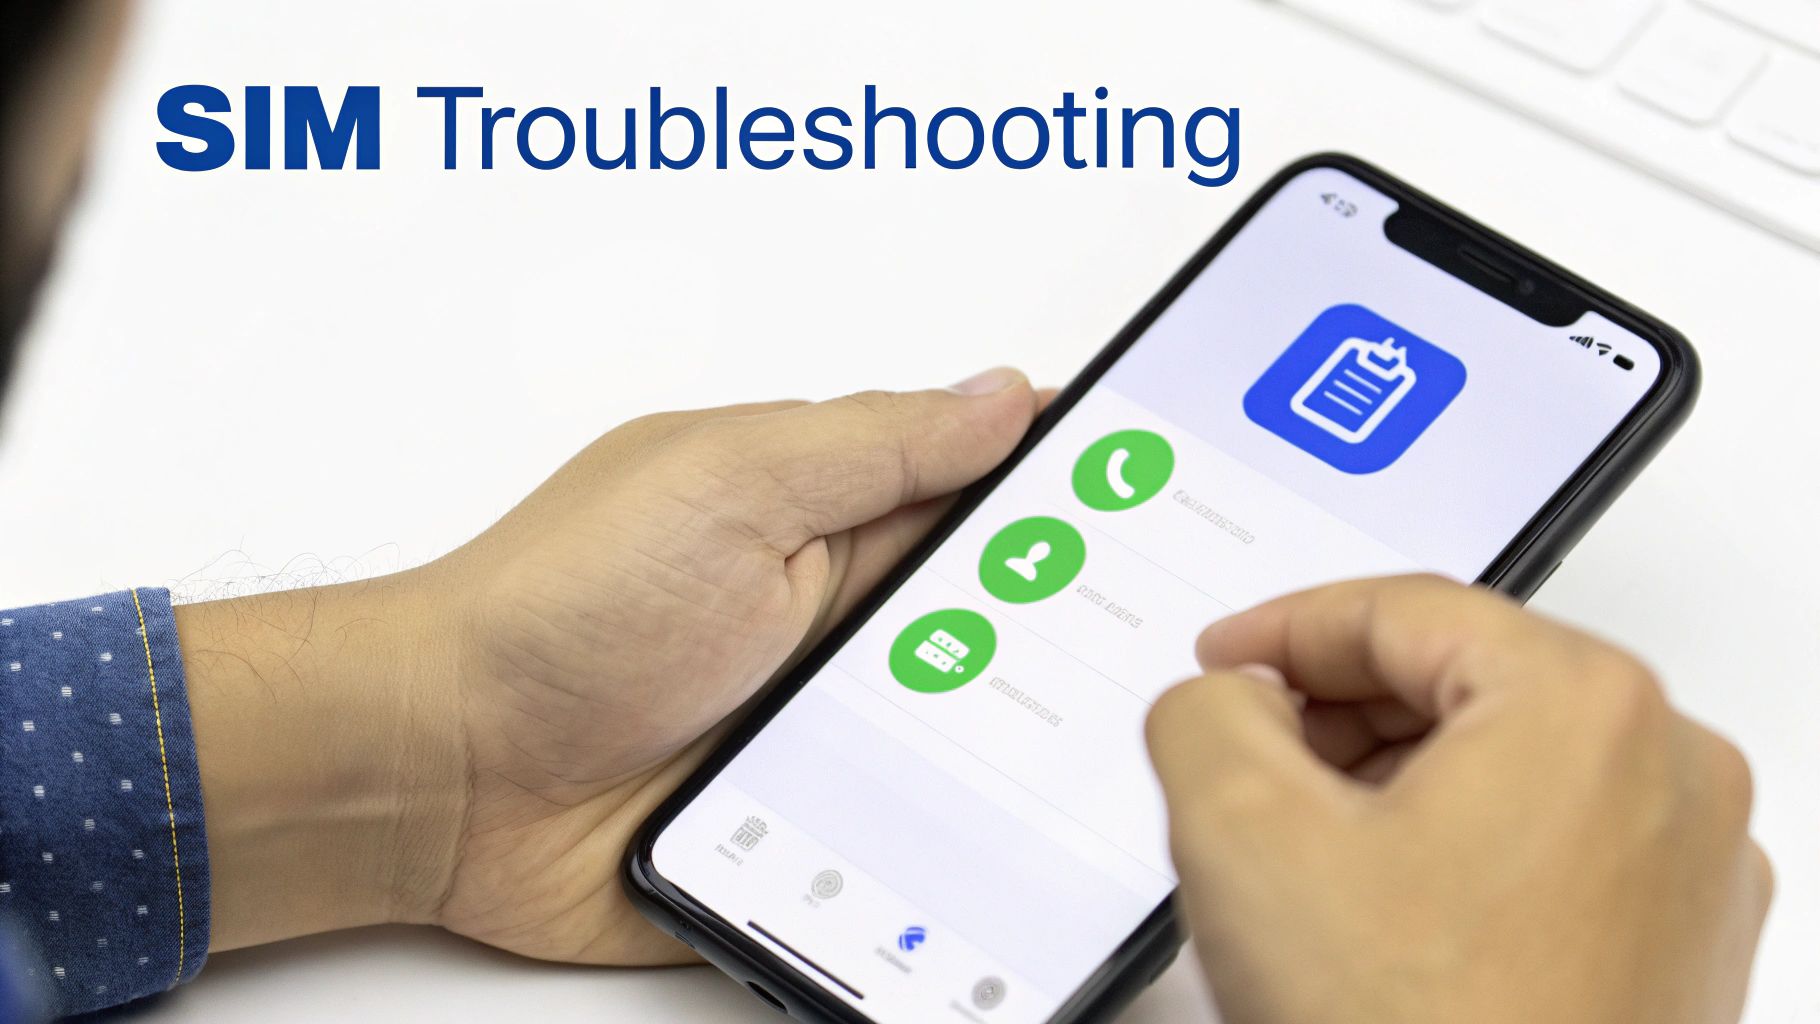
Even the most straightforward tech can have its moments. When you’re traveling, the last thing you want is to be wrestling with your phone’s settings. The good news is that most dual SIM hiccups are simple to solve yourself, usually in just a few seconds.
Here’s a look at the most common snags travelers encounter and how to get back online fast.
The number one concern travelers have is making sure their phone doesn’t rack up a huge bill on their home plan. It’s a completely fair question, and thankfully, you can solve it by checking just a couple of settings.
If your travel eSIM isn’t connecting or you’re worried about accidental charges, run through this quick checklist. Most of the time, one of these steps will solve the problem instantly.
Once you know what to look for, you can manage your connection with confidence. For a more detailed breakdown, our troubleshooting guide for mobile data has you covered.
Seeing that dreaded “No Service” message can be alarming, but don’t panic. After running through the checklist above, the next thing to verify is that your travel eSIM is actually switched on. In your phone’s settings, you’ll see a toggle for each SIM line—just make sure your travel one is enabled.
A handy trick if you see “No Service” right after landing is to toggle Airplane Mode. Switch it on for about 30 seconds, then turn it off. This action forces your phone to perform a fresh scan for local networks, which often does the trick.
If you’re still stuck, it might be time for a manual network selection. Your phone is designed to automatically pick the best local network, but sometimes it needs a little guidance. Head back into your mobile settings, find the option to scan for networks, and manually select one of the providers listed in your eSIM activation details. This simple move often gets you connected right away, letting you get on with your trip.
Now you know the secret to unlocking affordable, easy-to-use mobile data almost anywhere in the world. Dual SIM, particularly when paired with an eSIM, genuinely puts you in control of your connectivity.
Forget the old routine of hunting for a local SIM card the moment you land or dreading a massive roaming bill when you get home. Now, you can step off the plane, switch on your data plan, and be online in minutes.
This flexibility is exactly why dual SIM phones are becoming so popular. It’s expected that by 2025, over a quarter of smartphone users in major markets will have a dual-SIM device. It’s a trend that makes perfect sense, especially with more people working remotely and traveling internationally. eSIMs just make the whole process of managing two lines on one phone incredibly straightforward. You can read more about the findings on UK mobile trends if you’re curious.
Now that you understand how dual SIM works, you’re all set for your next trip. Check out the instant, affordable data plans on TapSim.net and see for yourself how easy it is to stay connected wherever your travels take you.
Have questions about using dual SIM on your next trip? It can seem technical at first, but it’s quite straightforward once you get the hang of it. Here are some plain-English answers to the most common queries we hear from travelers.
Yes, absolutely. This is a huge relief for most travelers! Apps like WhatsApp are tied to your phone number, not the SIM card that provides the data.
When you set up a travel eSIM for data, you just keep your home SIM active for calls and texts. WhatsApp will work exactly as it always does, using the travel eSIM’s data in the background. Your contacts won’t notice any difference. This setup has become essential for digital nomads and frequent travelers, letting them juggle personal and travel connectivity without any fuss. It’s a big part of how the mobile market has evolved, as detailed in reports on the growth of eSIM connectivity from Kaleido Intelligence.
This is a crucial question, and it all comes down to your home network’s specific roaming policy. Receiving texts is usually free when you’re abroad, but answering an incoming call can often be expensive.
The safest bet is to check your provider’s international rates before you fly. A simple trick is to decline any calls that come through on your home number. You can then call the person back using a data-based app like FaceTime Audio or a WhatsApp call, which will use your travel eSIM’s data instead.
No, and that’s the real beauty of it for traveling. You can keep your regular SIM from your home provider running alongside a travel eSIM from a completely different company, like TapSim.
The only requirement is that your phone must be ‘unlocked’, which means it isn’t restricted to one network. Most phones sold today are unlocked, but it’s always good to double-check before you travel.
Not really. Modern smartphones with Dual SIM Dual Standby (DSDS) are incredibly power-efficient. While having two lines active technically uses a tiny bit more power than one, the difference is so small you’re unlikely to notice it in daily use. The convenience it offers massively outweighs any negligible battery drain.
Ready to travel smarter? With TapSim, you can get affordable, instant data in over 150 destinations without the hassle. Check available eSIMs on TapSim.net and connect the moment you land.