Think of an eSIM as a digital SIM card that’s already built into your phone. Instead of fumbling with a tiny piece of plastic, you download a digital “profile” from an eSIM provider. This gives you immediate access to a local mobile network for data, which is a game-changer for travelers. You can get online within minutes of landing, without ever needing to swap your physical SIM card.
What an eSIM Is and How It Keeps You Connected
Imagine your phone has a blank, reusable SIM card permanently installed inside it. That’s pretty much what an eSIM, or embedded Subscriber Identity Module, is. It’s a tiny chip soldered directly onto your phone’s main board, ready to be programmed with whatever mobile plan you need for your trip.
The process is entirely digital. Instead of hunting down a shop for a physical SIM card upon arrival, you can browse and buy a data plan online before you even leave home. Once you purchase, you’ll usually get a QR code. Scanning that code is like inserting a digital key; it tells your phone to download the network profile for your destination, whether you need data for a week in Italy or a month backpacking through Southeast Asia.
For any traveler, this changes the game completely. You can sort out your mobile data before you even pack your bags. With TapSim, travelers can activate data instantly before takeoff by installing the eSIM on their home Wi-Fi. The second you touch down at your destination, you just flick a switch in your settings to get instant internet.
The Core Idea: An eSIM separates the plan from the hardware. The hardware is already in your phone; you just download the plan you need for your trip. It’s a far more flexible and modern way to stay connected around the world.
How eSIMs and Physical SIMs Compare for Travelers
So, how does this digital approach really stack up against the traditional SIM card you’ve been using for years? For a traveler, it all comes down to convenience and flexibility. Here’s a quick comparison to highlight the key differences.
Feature
eSIM (Embedded SIM)
Physical SIM Card
Activation
Instantaneous. Download and activate online in minutes via a QR code or app.
Requires purchasing and physically inserting a plastic chip.
Flexibility
Store multiple plans on one device and switch between them easily.
One plan per card. To change plans, you must swap the physical card.
Convenience
No physical components to lose. Perfect for sealed devices like smartwatches.
Small, easy to lose or damage, especially when traveling.
Availability
Purchase from anywhere with an internet connection, even before you travel.
You have to find a physical store or airport kiosk upon arrival.
Ultimately, eSIMs remove the hassle of finding and swapping physical cards, letting you get connected faster and manage your plans digitally.
What are the Key Differences for Travelers?
Let’s break down what this really means for you on the road. The main benefits are all about making your life easier and your travels smoother.
Instant Activation: You can buy and set up a plan from your sofa or an airport lounge in just a few minutes, as long as you have an internet connection. Say goodbye to searching for a SIM card kiosk after a long, tiring flight.
Multiple Plans on One Device: Most modern phones can store several eSIM profiles at once. This is brilliant if you’re country-hopping. You can have your plans for France, Japan, and the USA all loaded up and ready to activate the moment you land.
No Physical Swapping: You’ll never have to worry about losing your tiny home SIM card while you’re away. Everything is handled right from your phone’s settings menu.
This technology genuinely simplifies staying online abroad, taking away the usual stress that comes with finding international mobile data. For a deeper look into the technical side, you can explore our detailed guide explaining what an eSIM is and how it’s designed for modern travelers. It’s simply a smarter way to get affordable data without the fuss.
How Your Phone Activates an eSIM Profile
Getting a travel eSIM up and running might sound a bit technical, but it’s actually a straightforward and secure process. When you buy a plan from a provider like TapSim, you’re essentially given a digital key—usually a QR code—that unlocks mobile data for your trip.
This key contains all the instructions your phone needs to connect to a network abroad. The moment you scan it, your device securely contacts a special server. This server then sends a small, encrypted package of information, known as a network profile, straight to the eSIM chip inside your phone.
Think of this profile as the soul of your connection. It holds all the critical network settings and credentials that allow your phone to identify itself to the local mobile towers in another country. The entire exchange happens “over the air,” so you never have to fumble with a physical SIM card again.
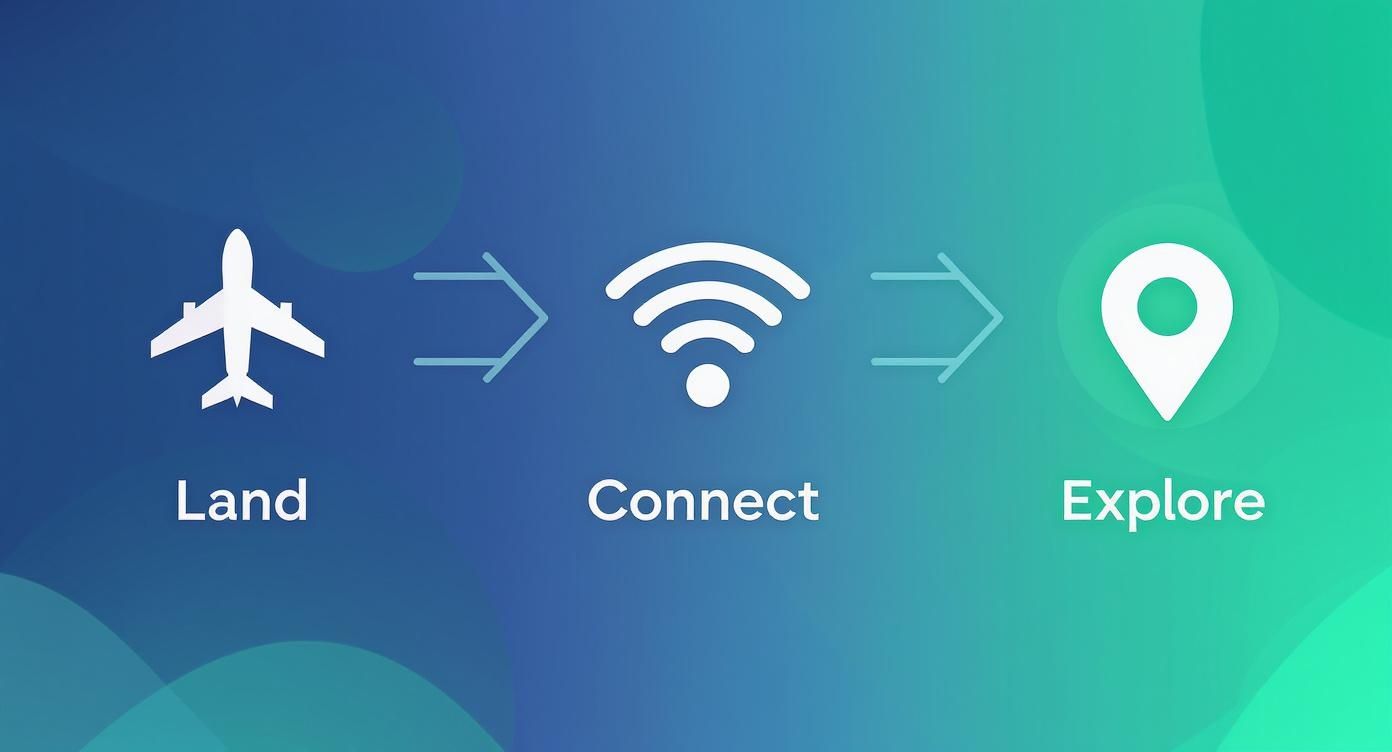
The infographic below breaks down how this technology completely changes the travel game, from the second you land to the moment you start exploring.
This simple three-step flow—landing, connecting, and exploring—is a world away from the old hassle of hunting for internet access after a long flight.
The Role of the QR Code in eSIM Activation
So, what’s the QR code actually doing? It’s best to think of it as a secure, one-time-use pointer. It’s not the eSIM profile itself, but rather a unique link that tells your device exactly where to go to download it.
When your phone’s camera scans the code, it kicks off a request to a highly secure system known as a Subscription Manager-Data Preparation (SM-DP+) server. This is the industry-standard platform that generates, stores, and delivers eSIM profiles on behalf of mobile operators.
Here’s a quick rundown of what happens in the background:
Scan: You point your phone’s camera at the QR code you received.
Request: Your phone sends a secure, encrypted request to the server address hidden within the code.
Authentication: The server checks that the request is legitimate and authorized.
Download: Once verified, the server safely pushes the network profile down to your phone’s eSIM chip.
After the profile is downloaded, it’s stored safely on your device. You can then manage it right from your phone’s settings, switching it on or off whenever you need to.
Why You Should Install Your eSIM Before You Travel
One of the best perks for any traveler is being able to sort all of this out before you even leave for the airport. You can buy and install your travel eSIM plan from the comfort of your own home, using your reliable Wi-Fi. The eSIM profile will just sit dormant on your device, patiently waiting for you to arrive at your destination.
Travel Tip: Always try to install your travel eSIM before you depart. This means you have a stable internet connection for the download and avoids any last-minute stress. Once you land, it’s as simple as flicking a switch in your settings.
With TapSim, this process is incredibly smooth. You get your activation details right after you purchase, so you can add the plan to your phone well ahead of your flight. As soon as you land, just enable your data line and you’ll be online in seconds. No more desperately searching for airport Wi-Fi or queuing up at a local SIM card kiosk. It just works.
Checking if Your Device Is eSIM-Ready
Before you can dive into the world of instant global data, there’s one quick check you need to do: make sure your smartphone is actually ready for an eSIM. Most modern phones are, but it’s always best to be certain before you buy a plan for that upcoming trip to Europe or Asia.
This is a crucial first step. While eSIM adoption is growing rapidly, many people aren’t sure if their phone supports the technology. Once they understand how it works, however, the benefits for travel become clear. You can find more on this in reports about the global adoption of travel eSIMs.
How to Check for eSIM Support on an iPhone
If you’re an Apple user, checking for eSIM capability is a breeze. It’ll take you less than a minute, and you can do it right on your device.
Here’s how:
Open up Settings on your iPhone.
Tap on Mobile Data (or Cellular Data, depending on your region).
Look for an option that says “Add eSIM” or “Add Data Plan”.
See that option? Great, your iPhone is good to go. As a general rule, any iPhone from the XS, XR, or SE (2nd generation) and onwards has eSIM technology built-in.
How to Check for eSIM Support on an Android Phone
For Android phones, whether it’s a Samsung or a Google Pixel, the process is pretty much the same. The menu names might vary a little from one manufacturer to another, but the logic is identical.
Head into Settings on your Android device.
Select Network & Internet or something similar, like Connections.
Tap on SIM cards or SIM card manager.
Search for an option to “Add eSIM”.
If you find it, your phone is ready. Most flagship models from Samsung (like the Galaxy S20 and newer), Google (Pixel 3 and newer), and other big names have included eSIM support for years.
Key Takeaway: There’s one more critical piece to this puzzle. It’s not just about the eSIM chip itself; your phone must also be “unlocked” by your home network provider. An unlocked phone is free to use SIMs or eSIMs from any company, which is absolutely essential for a travel eSIM to work. If you bought your phone directly from the manufacturer, it’s almost certainly unlocked. If you got it on a contract, it’s worth a quick call to your provider to check its status before you fly.
Making Sure Your Phone Is Unlocked for Travel
Think of an unlocked phone as your passport to affordable data anywhere in the world. If your device is “locked,” it will only connect to your home provider’s network, which means a travel eSIM simply won’t activate when you’re abroad. A quick chat with your carrier can usually get this sorted, especially if your contract has been fulfilled.
For a complete rundown of compatible devices and more in-depth checks, we’ve put together a handy guide on how to find out if your phone supports eSIMs. Once you’ve confirmed your phone is compatible and unlocked, you’re all set to use a service like TapSim for seamless connectivity on your next adventure.
Why Savvy Travelers Are Switching to eSIMs
For years, the traveler’s ritual was the same. You’d land, bleary-eyed, and immediately join a long queue at an airport kiosk to fumble with a new, tiny SIM card. The alternative? Risking it with your home network’s roaming plan and coming home to an eye-watering bill. Thankfully, those days are fading fast as savvy travelers discover the flexibility and power of eSIMs.
The biggest win is instant internet access. Imagine stepping off the plane, and before you’ve even made it to baggage claim, your phone is already connected to a local 4G or 5G network. No more hunting for patchy airport Wi-Fi just to book a taxi or let family know you’ve arrived safely. You just activate your pre-loaded eSIM, and you’re online.
This simple act of being connected from minute one completely removes a huge layer of travel stress. You can hit the ground running and focus on the adventure ahead.
Real Savings and Total Control Over Your Data
Beyond the sheer handiness, the cost savings are what truly convince most travelers. Home carrier roaming fees can be notoriously high, often charging a flat daily rate that quickly racks up. Local physical SIMs might seem cheaper, but you can end up with confusing plans or be forced to buy far more data than you need for a short trip.
Travel eSIMs cut through all that noise. They connect you directly to affordable local data rates without the markup. Need 1GB for a weekend city break in Europe? Or maybe 10GB for a month-long trip through Asia? You buy exactly what you need, and the pricing is completely transparent. If you start running low, topping up is usually just a few taps away in an app.
Unbeatable Convenience and Better Security
Having all your connectivity managed from one device is a game-changer. Your phone can hold multiple eSIM profiles at once. So, if you’re hopping between countries, you can have your plans for Spain, Italy, and Greece all loaded and ready to activate as you cross each border.
Plus, an eSIM offers a level of security a physical SIM just can’t compete with.
You can’t lose or steal it: Because the eSIM is embedded in your phone, there’s no tiny plastic chip to misplace while you’re swapping cards around.
It can’t be physically damaged: Dropping your phone won’t snap your digital SIM profile.
It’s a headache for thieves: If your phone gets stolen, thieves can’t just pop out your SIM card and put it in another device to try and bypass two-factor authentication.
The shift to eSIMs has been picking up pace, especially among travelers who want this mix of convenience and control. Millions of European travelers now rely on eSIMs every year, with many countries seeing rapid growth. You can read more about the rise of eSIMs for travel in Europe to see just how much it’s changing the way people stay connected abroad.
To really understand the options, let’s break them down side-by-side.
Comparing Your International Connectivity Options
Feature
Travel eSIM
Local Physical SIM
Home Carrier Roaming
Activation
Instant (digital, pre-arrival)
Manual (in-person purchase)
Automatic
Cost
Low to moderate
Low (can have hidden fees)
High (often daily charges)
Convenience
Very high (buy anytime, anywhere)
Low (find a store, queue up)
Very high (no setup needed)
Flexibility
High (store multiple plans)
Low (one SIM at a time)
Low (locked to one provider)
Security
High (cannot be physically stolen)
Low (can be lost or stolen)
High (tied to your account)
Each method has its place, but for the modern traveler focused on cost, control, and convenience, eSIMs consistently come out on top.
A Quick Word of Advice: The only real catch with an eSIM is that you need an internet connection to download and install the profile in the first place. This is why it’s always recommended to buy and set up your eSIM from a provider like TapSim while you’re still at home, comfortably connected to your Wi-Fi. It’s a tiny bit of prep that guarantees a perfectly smooth start to your trip.
A Step-by-Step Guide to Your First Travel eSIM Installation
Ready to give an eSIM a try on your next trip? The whole process is a lot more straightforward than you might imagine. This guide will walk you through everything, step by step, so you can see just how easy it is to get affordable mobile data pretty much anywhere in the world.
From picking the right plan to getting it live when you land, we’ll strip away the jargon and give you the confidence to stay connected like a pro. The idea is to make your first time feel completely effortless, letting you focus on the adventure ahead.
Step 1: Choose and Purchase Your eSIM Plan
First up, you need a data plan that actually fits your trip. Think about how long you’ll be away and what you’ll be using your phone for. A quick city break in Europe might only need a 1GB plan, but if you’re off on a two-week tour of Asia, you’ll likely want 10GB or more.
With a provider like TapSim, you can browse plans by destination or even by region. The important stuff—data allowance, how long it lasts, and the price—is all laid out clearly, with no nasty surprises or hidden fees. Once you’ve found the perfect fit, buying it is just like any other online purchase.
As soon as your payment goes through, your activation details will land in your inbox, usually as a QR code. This little code is your unique key to getting online.
Step 2: Install Your eSIM Profile Before You Leave
This next bit is probably the single most important piece of advice for any first-time eSIM user: install your eSIM while you’re still at home, connected to your reliable Wi-Fi. Fiddling around with a download on dodgy airport Wi-Fi is a recipe for frustration.
Don’t worry, the installation itself is quick and your phone walks you through it. You definitely don’t need to be a tech wizard.
Here’s a quick rundown of what to expect:
Find the QR Code: Open the email you received after buying your plan.
Scan It: On your phone, head to Settings > Mobile Data > Add eSIM. Your phone’s camera will pop up, ready for you to scan the code.
Follow the Prompts: Your device will then guide you through a couple of confirmation screens. You can even give your new data plan a custom name, like “Europe Trip,” to make it easy to spot later.
Once installed, the eSIM just sits there quietly on your phone. It won’t activate and the clock on its validity period won’t start ticking until you actually connect to a network at your destination. A few minutes of prep at home means you’re ready to go the moment you land.
Traveler’s Tip: When you’re setting up the eSIM, your phone will ask which line to use for mobile data. For now, make sure you leave your primary (home) SIM selected. You’ll switch it over to your new travel eSIM once you’ve arrived.
Step 3: Activate Your Data Upon Arrival
So, you’ve landed, the plane has reached the gate, and the seatbelt sign is finally off. This is where the magic happens. Instead of starting that frantic search for a Wi-Fi password, you can get online in just a few taps.
Here’s how to bring your data to life:
Turn on Your eSIM: Go back into your phone’s Mobile Data settings and tap on your travel eSIM (the one you named “Europe Trip,” for example).
Enable Data Roaming: This is critical. Make sure you switch on Data Roamingfor your new eSIM line only. This is what allows it to connect to the local network. Just be sure you don’t turn on roaming for your primary SIM, unless you fancy a massive bill when you get home.
Select for Data: Lastly, set your travel eSIM as your chosen line for Mobile Data.
Within a minute or two, your phone will latch onto the local network partner, and you’ll see the 4G or 5G symbol appear at the top of your screen. And just like that, you’ve got fast, affordable internet to check maps, book a taxi, or send that “I’ve landed safely!” message. You’re all set to explore.
Troubleshooting Common eSIM Issues for Travelers
Even the most straightforward technology can have its off days. While eSIMs are designed to be incredibly simple, a few common problems can crop up, especially when you’re trying to get connected in a new country. Knowing how to sort them out quickly means less stress and more time enjoying your trip.
The good news? Most of these issues have a surprisingly simple fix. More often than not, a quick dive into your phone’s settings is all you need to get your data up and running. Let’s walk through the most common hurdles travelers face and the practical steps to get past them.
Why Is My eSIM Not Connecting to a Network?
You’ve landed, you’ve switched on your eSIM, but… nothing. No 4G, no 5G—just that frustrating “No Service” message staring back at you. This is easily the most frequent issue travelers run into, and it’s almost always resolved with a couple of quick taps.
Before you start to panic, run through this simple checklist.
Check Data Roaming Is On: This is the number one culprit, without a doubt. Your travel eSIM relies on data roaming to connect to local partner networks abroad. Head into your phone’s mobile settings, select your travel eSIM, and make sure the Data Roaming toggle is switched ON. Just remember to keep roaming OFF for your primary SIM to avoid any nasty surprise charges.
Give It a Minute: Sometimes, your phone just needs a moment to find and register on a new network, especially right after you’ve landed and switched off airplane mode. Be patient for a minute or two.
Restart Your Phone: It’s a classic for a reason. The old “turn it off and on again” trick really does work wonders. A simple restart forces your phone to re-scan for all available networks and establish a completely fresh connection.
What if the QR Code for Installation Is Not Working?
So, you’re getting ready for your trip and trying to install your new eSIM, but the QR code just won’t scan. It’s frustrating, but don’t worry, you’ve got other options. Most eSIM providers, TapSim included, give you an alternative manual installation method.
Instead of scanning, you can just type the activation details in yourself.
Look for an option like “Manual Activation” or “Enter Details Manually” on your phone’s eSIM setup screen.
Your confirmation email should have all the details you need, usually an SM-DP+ Address and an Activation Code.
Simply copy and paste those details into the right fields on your phone, and the installation will continue just as if you’d scanned the code.
Traveler’s Tip: Don’t forget the simple things! A smudged camera lens or poor lighting can easily cause scanning problems. Give your phone’s camera a quick wipe and make sure you’re in a well-lit room before trying again.
What to Do If You Accidentally Delete Your eSIM
It happens. In a rush to clear out old plans, you might accidentally remove an active eSIM profile from your phone. Unfortunately, once a standard eSIM profile is deleted, it can’t be recovered or reinstalled with the same QR code. This is a security feature built into the system to prevent anyone else from using your plan.
If you delete your eSIM by mistake, you’ll need to get in touch with your provider’s support team. They’ll be able to guide you on the next steps, which will likely involve getting a new plan. This is exactly why it’s a good habit to only remove old eSIM profiles once you’re absolutely certain your trip is over and you no longer need the plan.
Even with the clearest instructions, a few questions always pop up when you’re trying something new. It’s completely normal. This final section is all about tackling those common queries travelers have about using an eSIM in the real world, helping you put the last few pieces of the puzzle together. My goal here is to make sure you feel totally confident and ready to make the switch on your next adventure.
Can I Use an eSIM and My Regular SIM at the Same Time?
Yes, you absolutely can. Most newer smartphones are Dual SIM devices, which is a massive bonus for any traveler. This nifty feature lets you keep your main physical SIM card active for things you can’t miss, like calls or those all-important verification texts on your home number.
While your home SIM is handling that, you can set your travel eSIM as the go-to for all your mobile data. It’s genuinely the best of both worlds. You stay reachable on your home number while using cheap, fast local data for Google Maps, browsing, and messaging apps. It’s dead simple to manage this – you just hop into your phone’s settings and tell it which line to use for data.
What Happens After My eSIM Data Plan Expires?
Once your data is used up or the plan’s validity period ends, the eSIM simply stops working. It doesn’t vanish from your phone or anything dramatic like that. The profile just sits there on your device, inactive.
If the plan allows for top-ups, you can easily add more data. If not, or if your trip is over, you can just delete the profile from your phone’s settings to keep things tidy. A great little feature of modern phones is that they can store several eSIM profiles, so you could keep plans for frequent destinations like Europe or Japan ready to go for your next visit.
Does a Travel eSIM Give Me a Local Phone Number?
Usually, no. The overwhelming majority of travel eSIMs, including the ones from providers like TapSim, are data-only. This is done on purpose. It’s what keeps the plans so affordable and the activation process so straightforward, as it sidesteps the identity checks that often come with getting a local phone number.
This setup is perfect for how most of us travel today. We use apps like WhatsApp, FaceTime, or Telegram to make calls and send messages anyway. By relying on data for all your communication, you can stay in touch with everyone back home without needing a traditional phone number at your destination. It’s just a smarter, more cost-effective way to stay connected.
Key Takeaway: An eSIM lets you add a flexible data plan to your phone without messing with your primary number. You get cheap, local data for all your internet needs, while your main SIM handles calls and texts as usual. It’s the ideal setup for staying connected affordably anywhere in the world.
Ready to skip the roaming fees and get connected the moment you land? With TapSim, you can choose from affordable data plans in over 150 destinations and get your eSIM instantly.
You’ve just landed in a new country, phone in hand, but the internet isn’t working. It’s a modern traveler’s nightmare, but don’t worry—the fix is usually surprisingly simple. Before you…
Dual SIM technology is a bit like having a hybrid car. It intelligently switches between two power sources to give you the best performance and efficiency. For your phone, this…
Figuring out how much data you’ll need for a trip can feel like a shot in the dark, but it really doesn’t have to be. For a standard week-long holiday,…
For any traveler, the best pay-as-you-go (PAYG) option is almost always a modern eSIM. Think about it from a practical standpoint: you get instant activation right from your phone, transparent…
Getting a new iPhone is always exciting, but for a traveler, ensuring your eSIM transfers smoothly is crucial. Whether it’s your primary number or a travel data plan for an…
Activating a travel eSIM is one of the smartest pre-trip tasks you can do, and it’s much simpler than it sounds. Think of it as a digital SIM card that…
Not long ago, staying connected abroad meant navigating a minefield of eye-watering roaming charges or scrambling to find a local SIM card the moment you landed. Thankfully, things have moved…