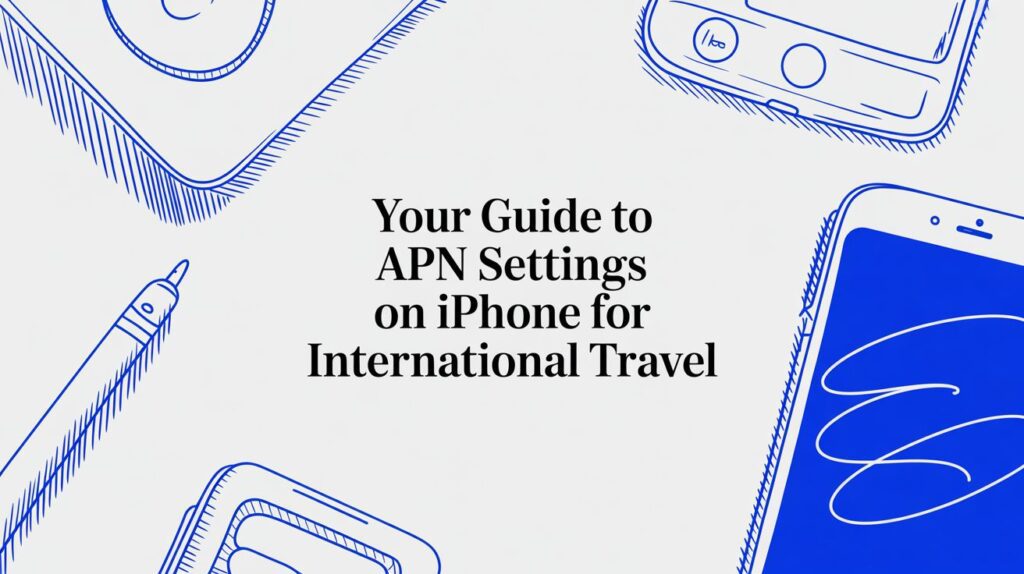
Best eSIM for Europe Trip: What to Pick
Looking for the best esim for europe trip plans? Compare coverage, speed caps, hotspot rules, and pricing to avoid roaming fees and surprises.

You’ve just landed, your travel eSIM is activated, but… no internet. It’s a classic travel headache, and the culprit is often a tiny, overlooked detail: your APN settings on iPhone.
Think of the Access Point Name (APN) as the specific gateway your iPhone needs to find and connect to your mobile provider’s data network. Without the right APN, your phone is like a car without a GPS—it has no idea how to reach the internet.
Back home, your regular mobile provider configures the APN automatically. It just works, so you never have to think about it. But when you travel internationally and activate a new travel eSIM, your iPhone might be holding onto those old settings, which won’t work with your new data plan.
Without the correct APN for the local network you’re using, your iPhone is lost. It can’t get online, leaving you stranded without maps, messaging, or ride-hailing apps right when you need them most.
Imagine landing in Rome, excited to find your hotel. You wisely activated a travel eSIM before your flight, but now your phone can’t get a data connection. Google Maps won’t load, you can’t message your Airbnb host, and the train timetable is inaccessible.
This exact situation happens all the time. After a stressful hunt for airport Wi-Fi, the solution is usually simple: the iPhone was still trying to connect using the home network’s APN. A quick, manual update with the details from the eSIM provider, and—instant internet. This small tweak is often the only thing standing between you and seamless, affordable data with a travel eSIM from TapSim.
An incorrect APN is the number one reason travelers can’t get online after installing a new eSIM. Learning how to check and change it is a simple skill that can save you a world of stress.
Knowing how to manage your APN is just as important as understanding the basics of how mobile data works when you’re abroad. To avoid bill shock on your trip, it’s worth taking a moment to learn more about what data roaming is and how travel eSIMs help you sidestep high fees.
Before you can fix a connection issue or set up a new travel eSIM, you need to know where the APN settings on your iPhone are located. I always recommend checking this menu before a trip; it’s a simple step that can save you a lot of frustration when you land.
Thankfully, Apple keeps things fairly consistent across recent iOS versions, so you won’t have to dig through endless menus.
The path to your APN settings is usually quite direct. Getting familiar with it before you’re standing in a foreign airport is a smart move.
Here’s the typical route you’ll take:
This last screen is where you’ll find the fields for APN, Username, and Password, which control how your iPhone connects to your provider’s data network.
So, what happens if you follow those steps and the Mobile Data Network option isn’t there? Don’t worry, your phone isn’t broken. This is often a deliberate restriction put in place by certain mobile carriers.
Some home network providers lock or hide the APN settings to prevent customers from easily using other networks—like an affordable travel eSIM. If the option is missing, your carrier is likely controlling these settings.
This can be a real roadblock for travelers. Without access to that menu, you can’t manually input the details needed for your new eSIM to connect to the internet. It effectively ties you to your home provider and their expensive roaming packages.
If you find yourself in this situation, the best course of action is to contact your home network before you travel. Explain that you need the APN settings unlocked for international travel. Getting this sorted out ahead of time is crucial for a stress-free trip.
For more detailed setup advice, you can also check out our complete guide on how to activate an eSIM on your iPhone.
Many global travel eSIMs, including those from TapSim, may require you to manually enter their APN details to get connected. This isn’t a complex technical hurdle—it’s a straightforward, two-minute task that tells your iPhone exactly how to connect to the local network for a solid data connection right after you land.
Once you find your way to the Mobile Data Network screen we walked through earlier, you’ll see a few empty boxes. For most travel eSIMs, you only need to focus on three of them: APN, Username, and Password. Your eSIM provider will have sent you these details, usually in your activation email or app. Have that information ready.
Picture this: you’ve just touched down in Tokyo. You’ve switched on your TapSim eSIM for Japan, but the data isn’t working. It’s time to check the APN settings.
You’d navigate to the Mobile Data Network screen and fill in the details provided. For example, your instructions might say:
You would just type “globaldata” into the APN field and leave the other two fields completely empty. The specific details will vary depending on the eSIM and your destination, but the method is always the same.
Expert Tip: I can’t tell you how many times a simple typo is the culprit. APN details are often case-sensitive, so it pays to double-check every single character. A misplaced space or one wrong letter is all it takes to prevent the connection from working.
While you’ll often only need the main APN, knowing what the other fields are for can be handy. It helps demystify the process and puts you in control.
Here’s a quick reference guide to help you understand what you’re looking at in your APN settings.
| Field Name | Purpose | Where to Find the Information |
|---|---|---|
| APN | This is the main address your iPhone uses to find the network’s data gateway. It’s the most important piece of the puzzle. | Always provided in your eSIM activation instructions. |
| Username | Some networks require a specific username for authentication before they let you connect. | Included in your eSIM details if it’s required. More often than not, this field is left blank. |
| Password | This is the password that goes with the username for network access. | Also in your eSIM details if needed. Just like the username, it’s usually not required. |
Knowing these fields means you can confidently enter the details your provider gives you without any guesswork.
After you’ve carefully typed in the APN details and triple-checked them for typos, there’s one last thing you absolutely must do: restart your iPhone. This simple power cycle forces your device to apply the new settings and establish a fresh connection with the network. If you skip this, the changes might not take effect properly.
Don’t worry, this whole process is completely safe and reversible. If something doesn’t work or you want to go back to how things were, you can just delete what you entered or tap the “Reset Settings” option at the bottom of the screen.
Even with the correct APN, you might occasionally run into authentication problems, which are often a network-side issue. If you’re stuck with persistent connection errors, it’s worth learning how to resolve a PDP authentication failure to get yourself back online fast.
You’ve followed the steps, entered the right APN details, restarted your iPhone… and still, no data. It’s a frustrating moment that happens to even the most seasoned travelers, but don’t worry, the solution is usually a simple fix. This section is your troubleshooting checklist, built from real-world experiences to get you connected.
Sometimes the issue is that the ‘Mobile Data Network’ option is missing entirely, as some home carriers lock this setting. More often, however, it’s a minor setting elsewhere that’s blocking the connection. Before you do anything drastic, it’s worth running through a few quick checks.
This simple decision tree helps visualize the first steps in getting your travel eSIM online.
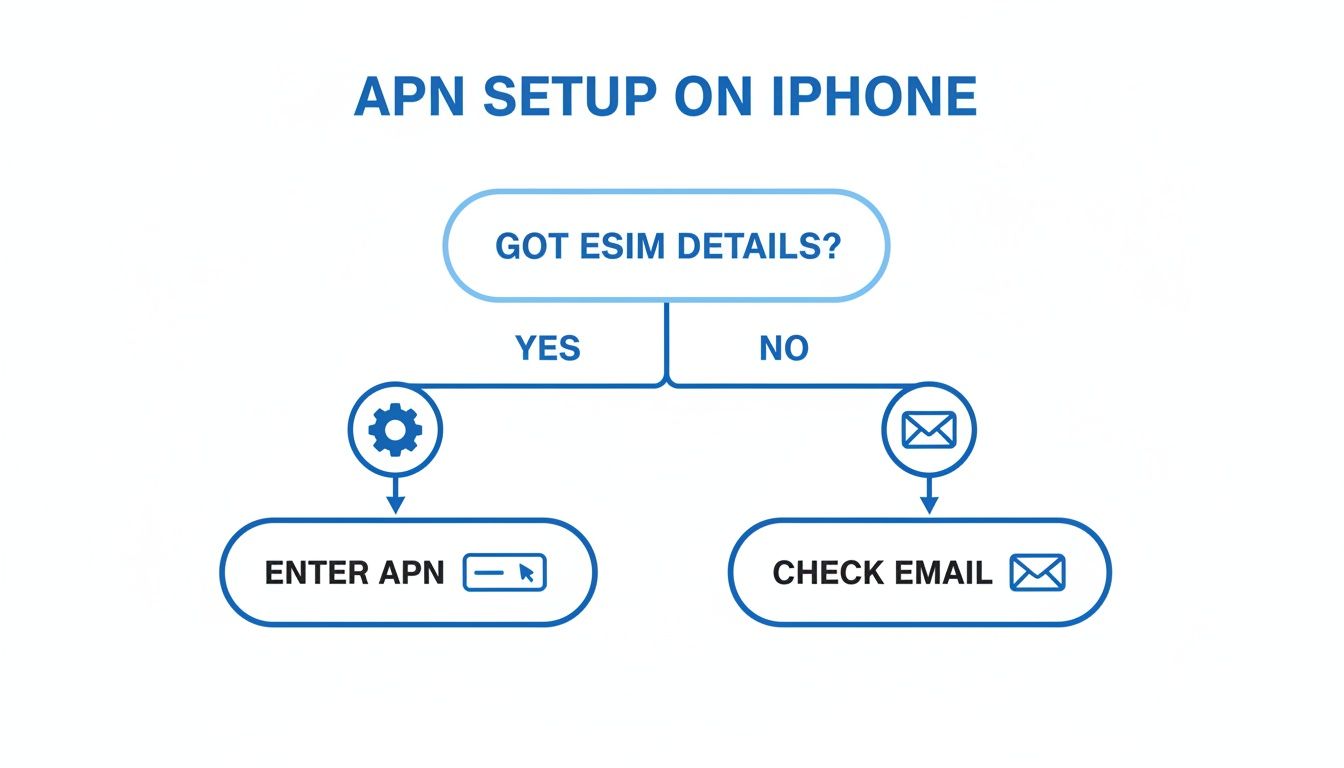
The key takeaway here is that everything starts with having the correct APN information, which your eSIM provider will always give you.
If your data isn’t working after setting the APN, take a deep breath and go through this list. Nine times out of ten, one of these points will solve the problem.
Settings > Mobile Service. Make sure the toggle next to your TapSim eSIM line is green and active.Settings > Mobile Service > [Your eSIM Line].Remember that enabling data roaming for your travel eSIM is completely different from enabling it for your home SIM. With a global eSIM like TapSim, roaming is how it works and won’t lead to surprise charges.
Another common headache is when you enter the APN details, leave the screen, and come back to find the fields are blank again. This usually points to a software glitch or a conflict with an old carrier profile.
Incorrect APN configurations are a significant issue for international travelers. For many users, manual APN adjustments are frequently necessary, with some eSIM providers noting that setup errors can cause initial data blackouts.
Fortunately, Apple has improved this since iOS 16. Carrier-supported devices now often auto-fill the APN upon installation, a change estimated to have cut down on manual interventions for major networks.
If your settings refuse to stick, try restarting your device first. If that fails, using the ‘Reset Settings’ button at the bottom of the ‘Mobile Data Network’ screen can be a helpful last resort. This option wipes any custom APN settings and restores your iPhone to its default network configuration, giving you a clean slate to re-enter the correct details for your travel eSIM.
Ideally, your iPhone handles its APN settings all on its own. When you use a SIM from a major domestic provider, your phone usually just works—it fetches the right settings from the network and you’re online in a flash.
This automatic setup is a lifesaver for day-to-day use. But when you’re traveling internationally and relying on a flexible, budget-friendly eSIM, things can get a bit more hands-on. Knowing when you need to step in and configure things yourself is the key to a stress-free trip.
Global travel eSIMs are a different breed. Providers like TapSim don’t tie you to a single network; instead, they partner with dozens of local carriers to give you solid coverage whether you’re exploring Rome or relaxing on a beach in Thailand.
Because these eSIMs are designed to hop between different networks, they can’t always rely on one carrier’s automatic configuration. This is precisely why many global eSIM providers ask you to enter the APN details yourself. It’s not a bug, but a feature—it ensures your iPhone knows exactly which gateway to use for the specific local network you’re currently on.
Think of it as giving your phone a universal access key that works in multiple countries.
Setting your APN manually is a fundamental skill for any eSIM user. It empowers you to take control of your connection and ensures you can get online with any compatible provider, anywhere in the world.
Thankfully, this whole process has become much more straightforward over the years. With some domestic mobile carriers, incorrect APN settings used to be a massive headache, often leaving users with working calls and texts but no internet.
Apple’s move towards auto-APN configuration in recent iOS versions has been a game-changer for the big networks. But for many smaller carriers and nearly all global eSIMs, manual entry is still the most reliable way to guarantee a connection. You can see how some carriers still provide detailed guides on their internet APN settings for iPhones.
For a traveler, being ready to pop in your APN details is the difference between landing and immediately ordering a ride-share, or spending your first hour hunting for a patchy Wi-Fi signal. It’s a tiny bit of prep that makes all the difference.
We’ve walked through the technical side of APN settings, but real-world travel throws up its own set of specific questions. Let’s tackle some of the most common ones I hear from travelers trying to get their data working abroad.
Not at all. This is a very common worry, but you can rest easy. Your iPhone is smart enough to keep the settings for your home SIM and your travel eSIM completely separate.
When you add a TapSim eSIM, it shows up as a new, distinct line in your mobile settings. Any APN adjustments you make are tied only to that travel eSIM. Once you’re back home and switch your mobile data back to your primary SIM, your iPhone will automatically revert to its original, correct APN. No manual changes needed.
Usually, no. This really comes down to your eSIM provider. With a global eSIM provider like TapSim, you’ll often find that one single APN (something simple like ‘globaldata’ or ‘internet’) works across dozens of countries.
Once you’ve configured it for your first destination, that setting should carry you through your entire trip, assuming all your destinations are covered by your plan. Of course, always give your activation instructions a quick read-through before you fly—that’s where you’ll find the definitive answer for your specific eSIM.
Pro Tip: Remember, the APN is tied to the eSIM provider’s network, not the country you’re in. If your eSIM plan covers Europe, one APN setup is typically all you need for the whole continent.
This is a frustrating one. If you can’t find the ‘Mobile Data Network’ option, it almost certainly means your home network provider has locked it down. If you’ve already landed abroad, your best bet is to find Wi-Fi and contact your eSIM provider’s support for potential workarounds.
The best solution is to check this before you leave home. A quick look in your settings will tell you if the menu is accessible. If it isn’t, give your home network a call. Explain that you need to use an international eSIM for travel and ask them to unlock the APN settings. Most providers will happily do this for you.
Yes, they absolutely can. If the APN settings on your iPhone are incorrect, your phone can’t get a solid lock on the data network. This causes it to constantly search for a signal, trying again and again to connect.
This relentless searching is a real power hog and can drain your battery much faster than usual. Getting the APN right doesn’t just get you online; it helps your phone run more efficiently and keeps your battery going longer.
Perfectly safe. Manually editing your APN is a standard procedure and you aren’t touching any critical system files. Think of it as simply giving your iPhone the right address to connect to the internet.
Everything you enter can be just as easily removed. If you make a mistake or want to start fresh, you can just delete the text you added or scroll to the bottom of the ‘Mobile Data Network’ screen and tap “Reset Settings.” This wipes your manual entries and restores the defaults without touching anything else on your iPhone.
Ready to travel without connectivity headaches? TapSim offers fair, fast, and honest travel eSIMs for over 150 destinations, so you can get online the moment you land.